I was just reading reviews of the new, Leica M10 Monochrom – a rangefinder style (“retro”) camera by the venerable German company (with history going back to 1914, and even further), which is designed to shoot only black-and-white. There are certain benefits to making dedicated b&w cameras, most importantly in the fact that all image sensors actually are black-and-white ones, with just different techniques such as applying “Bayer filter” on top of the b&w photosensors. This means that there is a grid of RGB colour filters on top of the sensor, so that some pixels in the final image are produced with only the red, green, or blue wavelenghts of light. This then needs to be further processed, with a demosaicing (or “debayering”) algorithms to construct the colour image out of (filtered) b&w information coming from the different parts of the image sensor.
And then, when this kind of colour digital camera is used for taking black-and-white photos, there needs to be further processing, as the colour values are removed to get back into a monocrome image.
A dedicated monocrome digital camera has the dual benefits of getting more light to the sensor, since there is no coloured filter layer on top of the sensor. This means that it can have perhaps 1 to 1.5 EV stop better light sensitivity. And also, there is usually slightly better dynamic range than in (filtered) colour sensors – e.g. in scientific equipment non-filtered monochrome sensors are often used, as they can capture higher range of wavelenghts, and operate better in low-light conditions.
The monochrom digital camera body by Leica has price tag of over 8000 dollars, and a good lens on top of that is perhaps 2000+ dollars more, so we are talking about 10 000+ dollars/euros investment. Also, the retro style ergonomics, old-school focusing system and lack of many features that are common in today’s digital cameras means that this camera is not for everyone. I would say that the main point of this kind of device is in producing social and cultural class divisions (relaying Bourdieu here). That M10 Monochrom surely would look nice on top of the dashboard of your Classic Porsche 911…
It is also true that at some point camera tech is like Hi-Fi audio tech: you can pay more and more, and at some point the final gains are so minor, that only those who are true believers are capable of noticing anything. (There are, after all, cameras like Phase One XF IQ3 100MP Achromatic, where the digital back alone costs over 50 000 dollars/euros.)
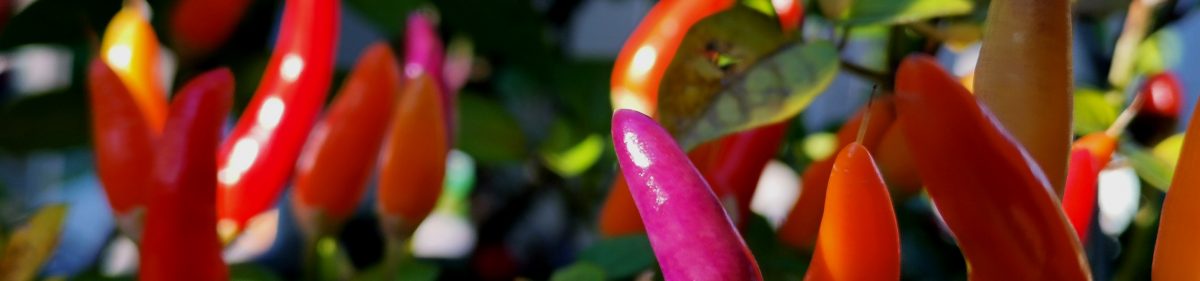
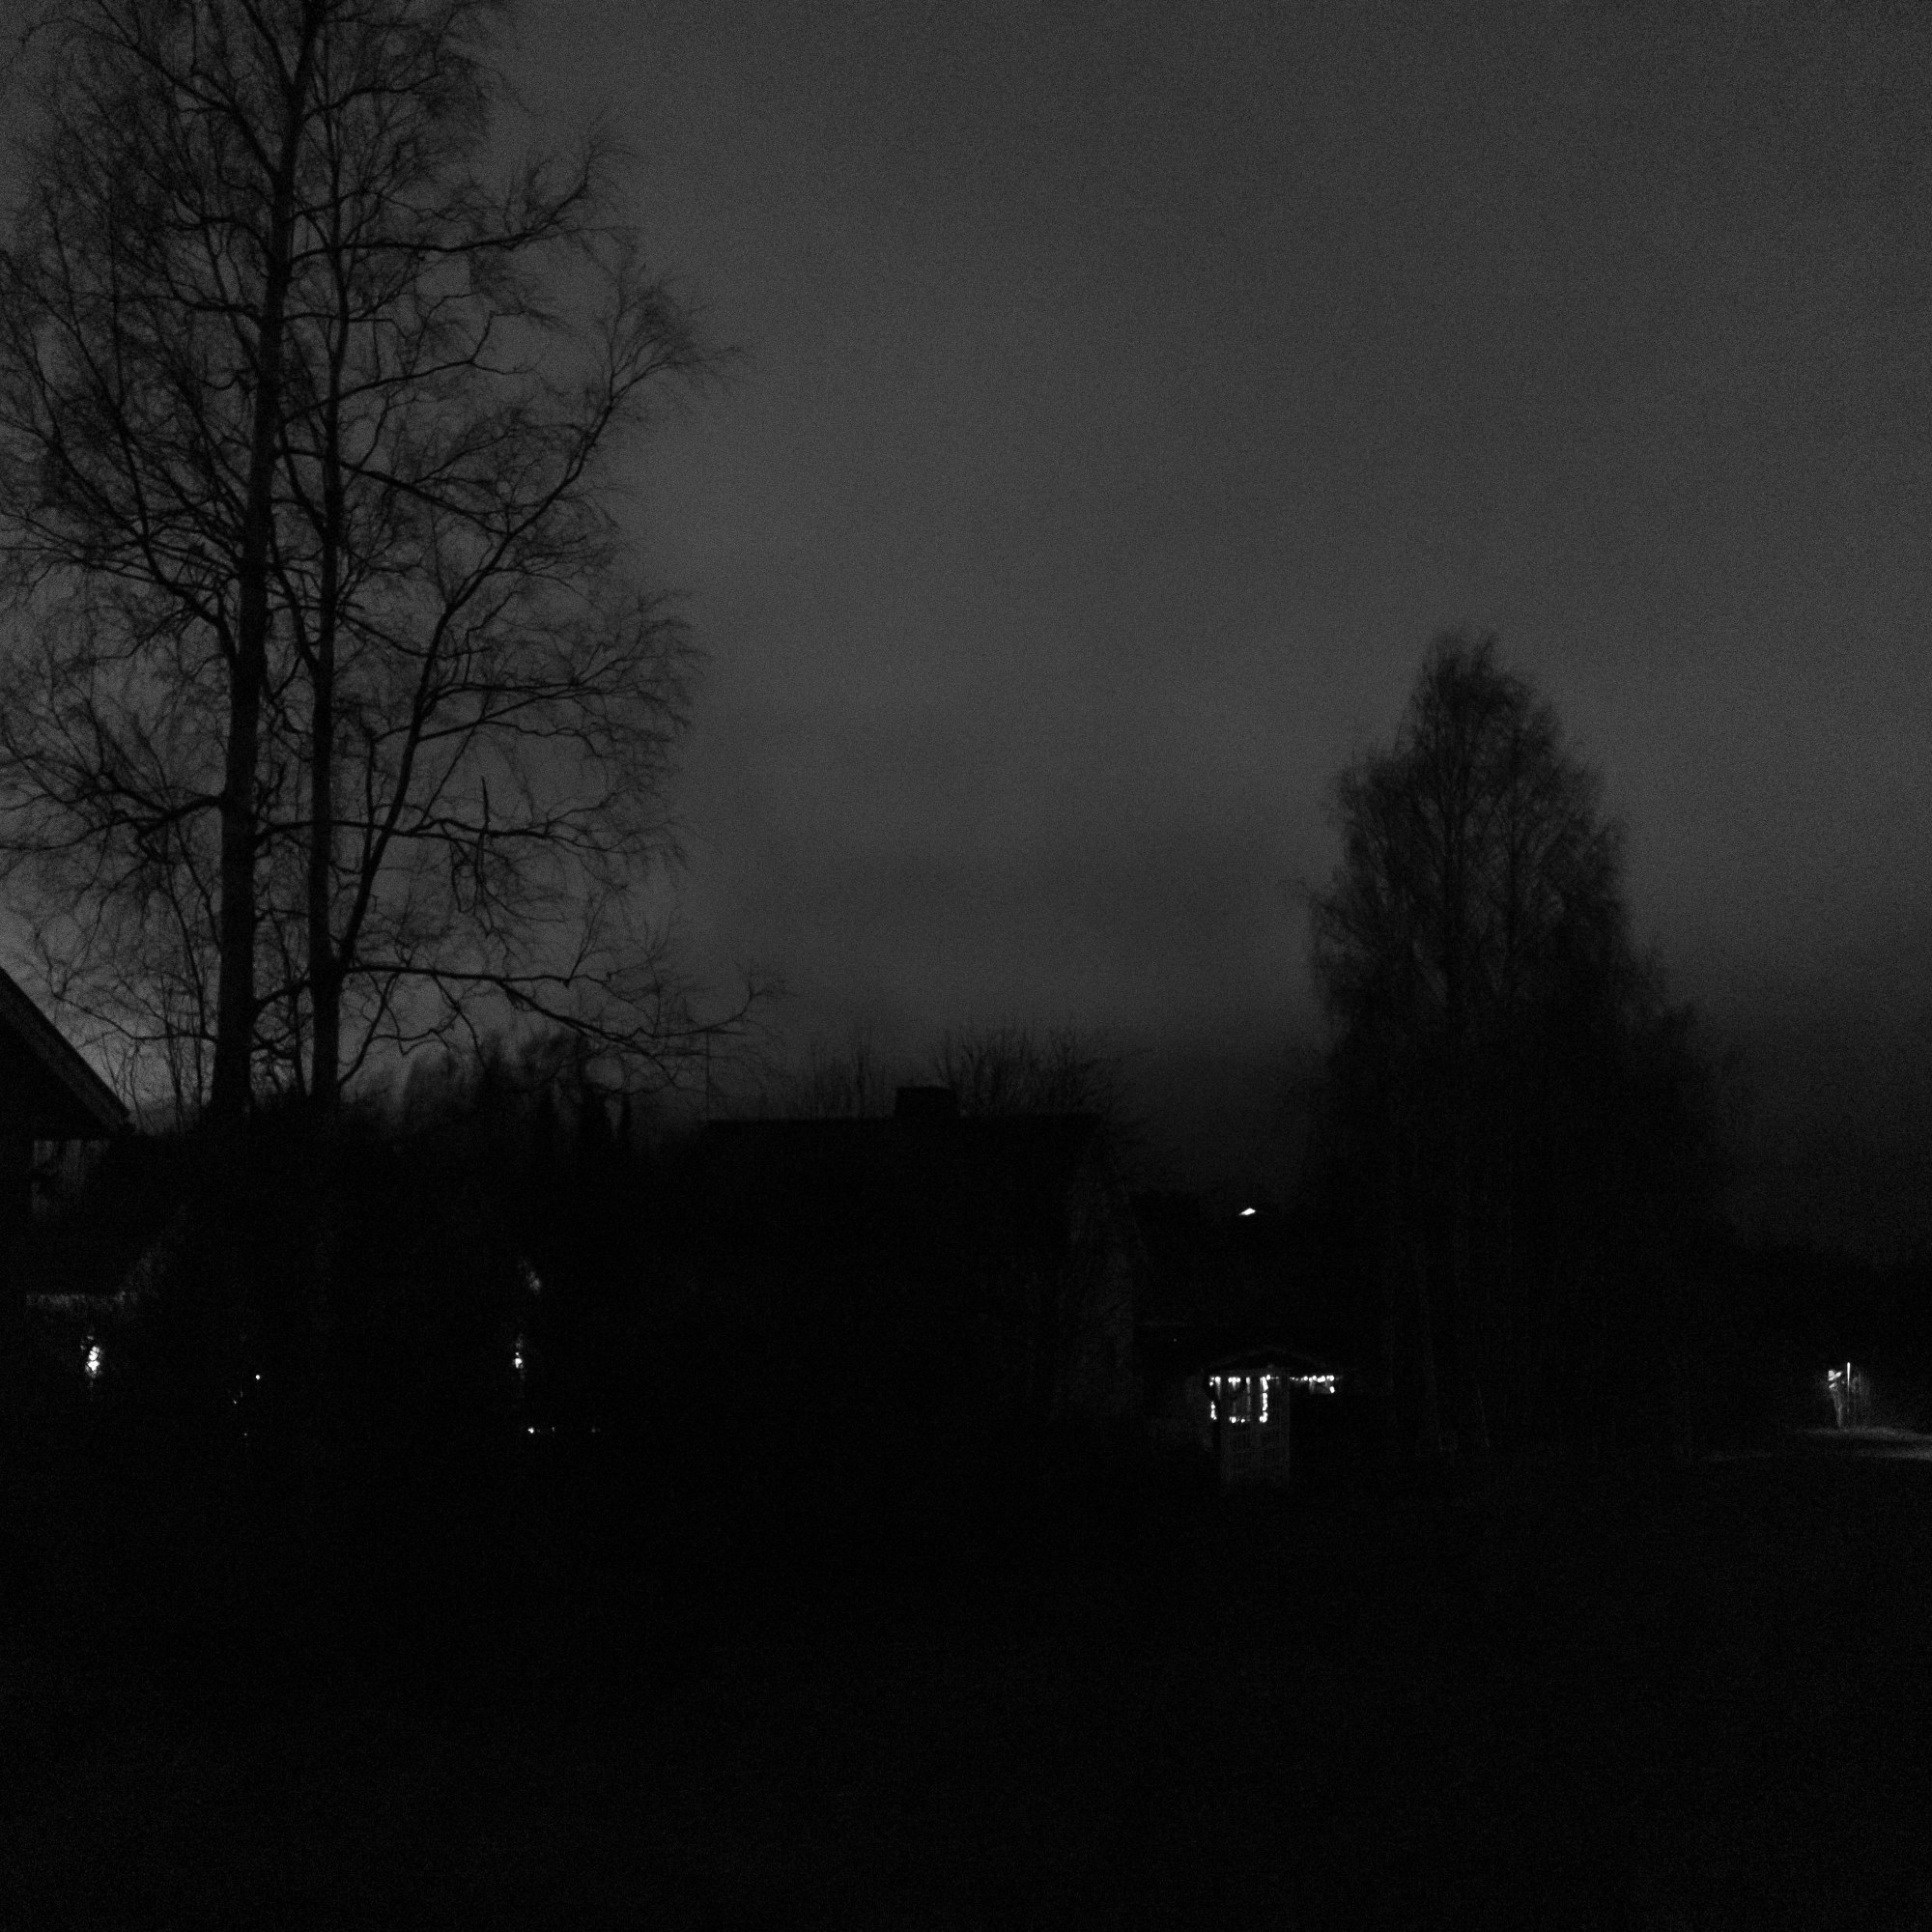
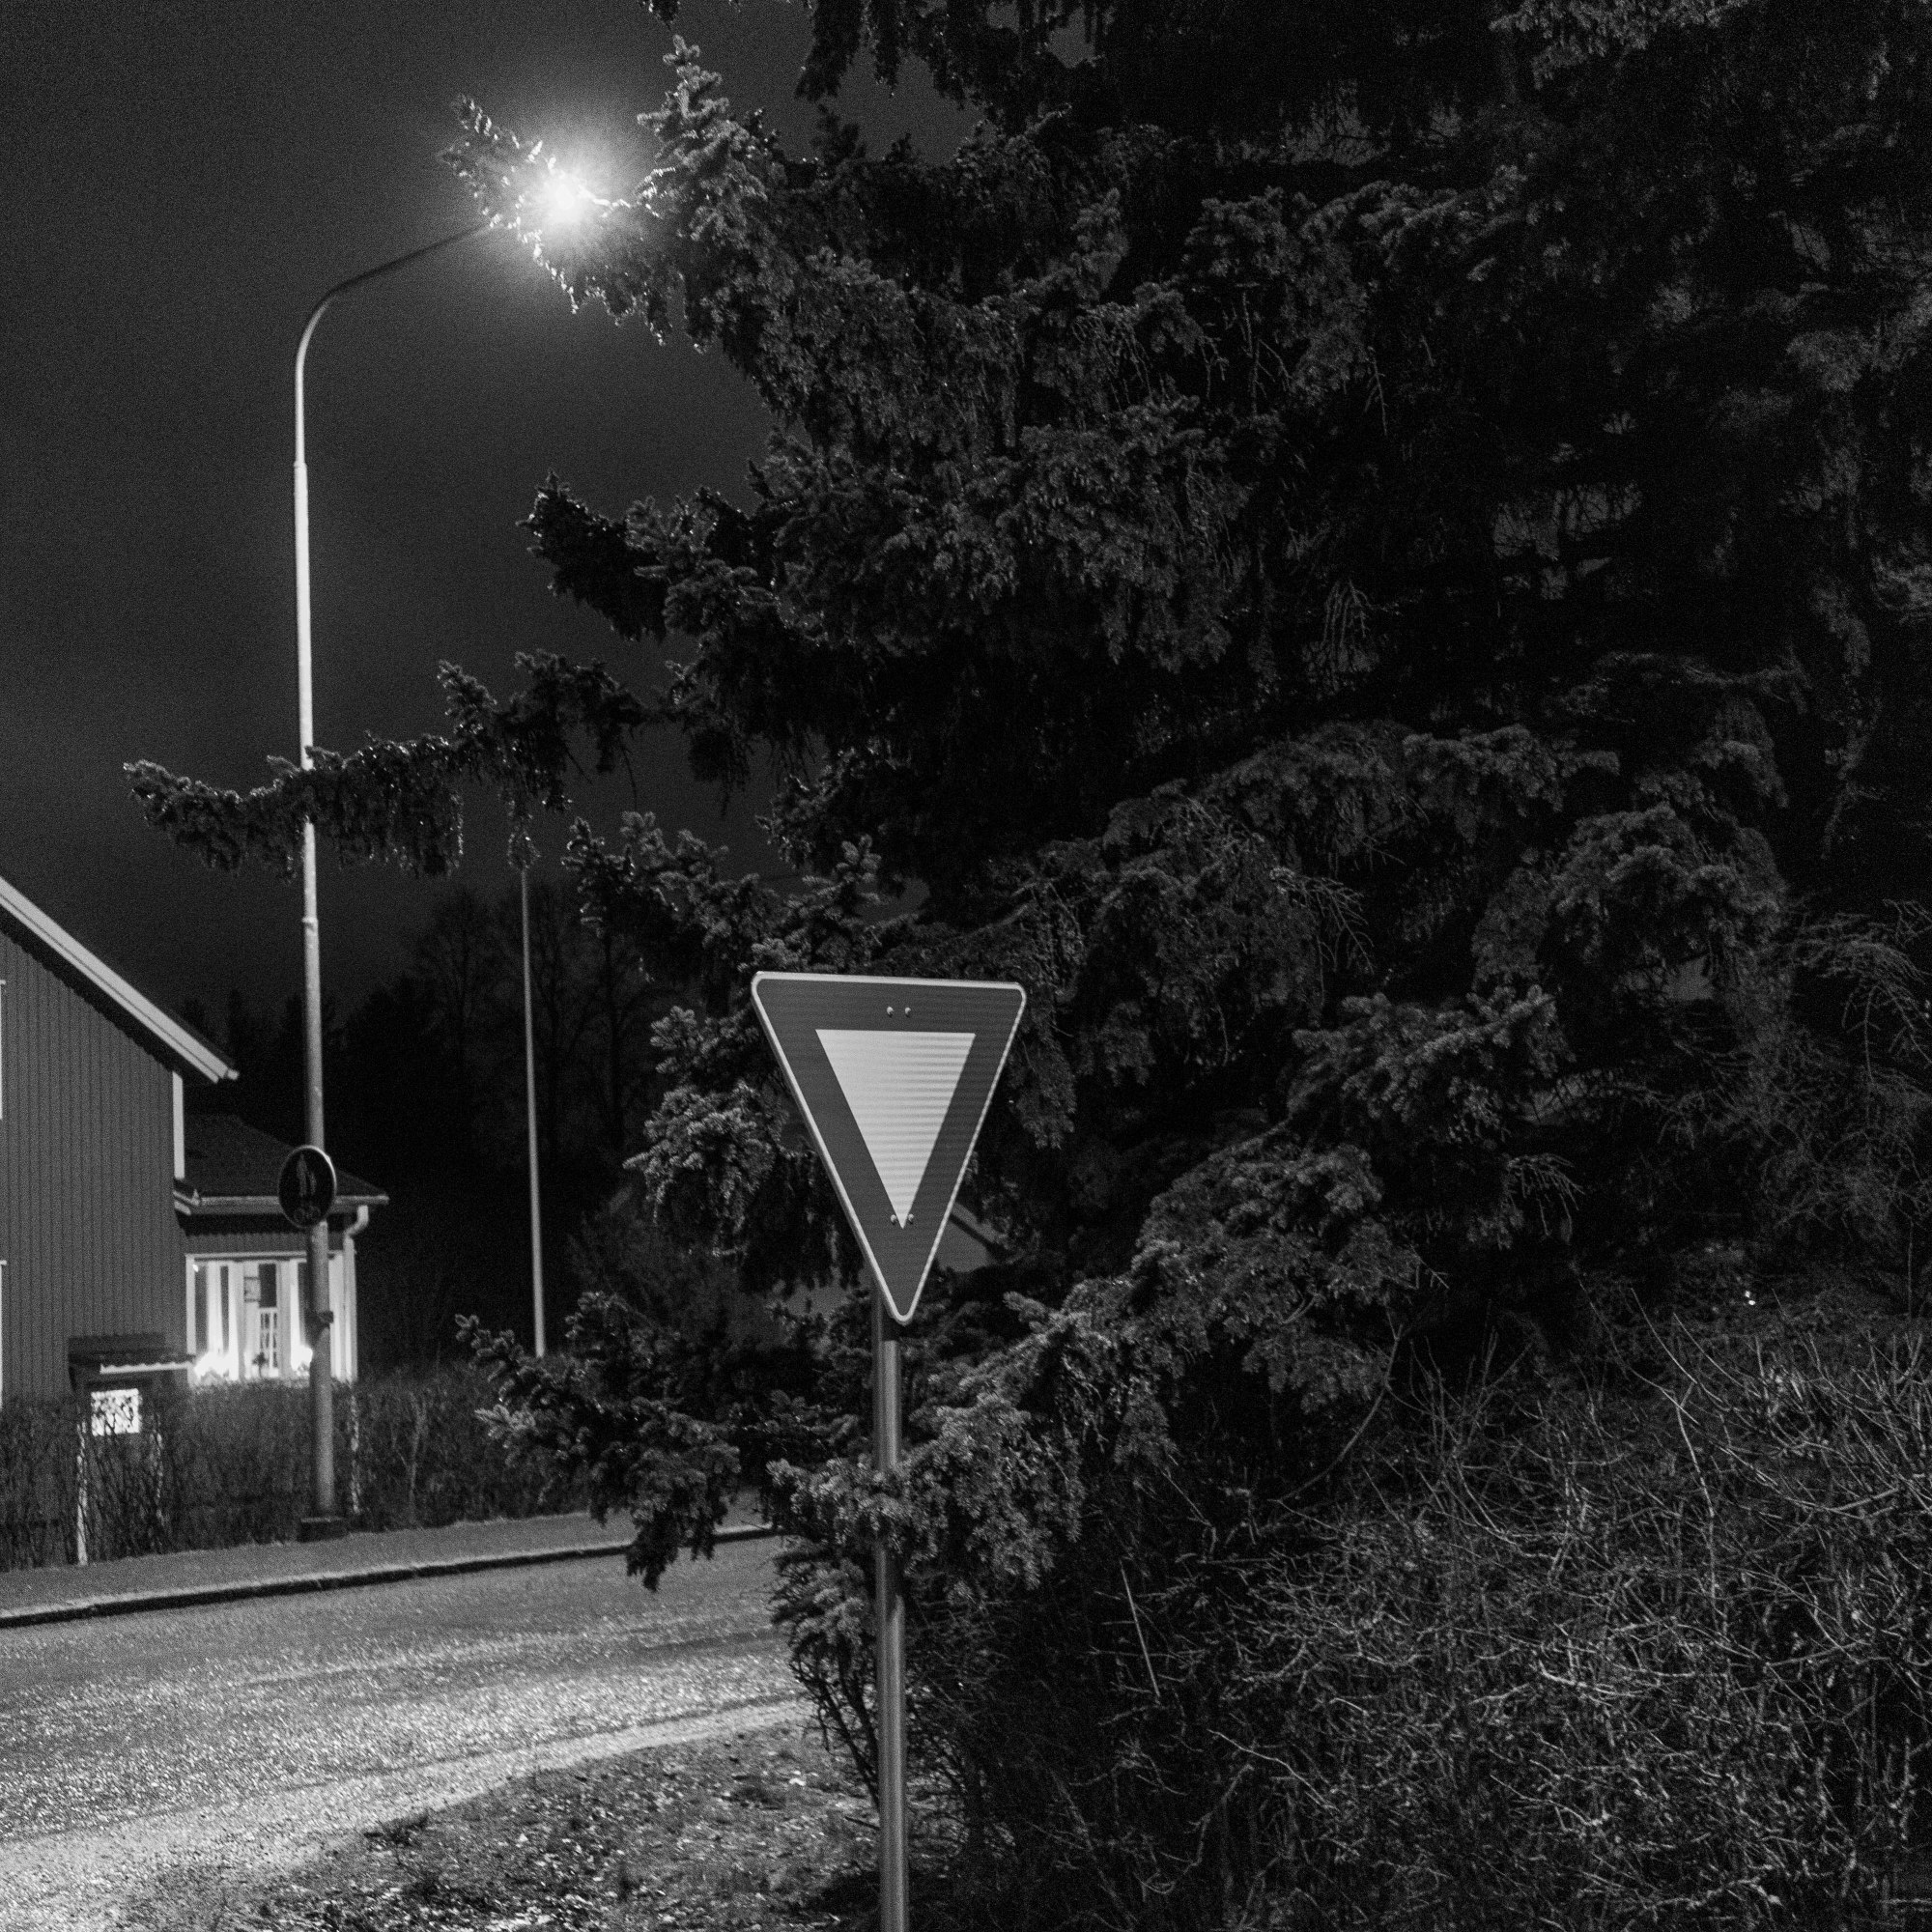
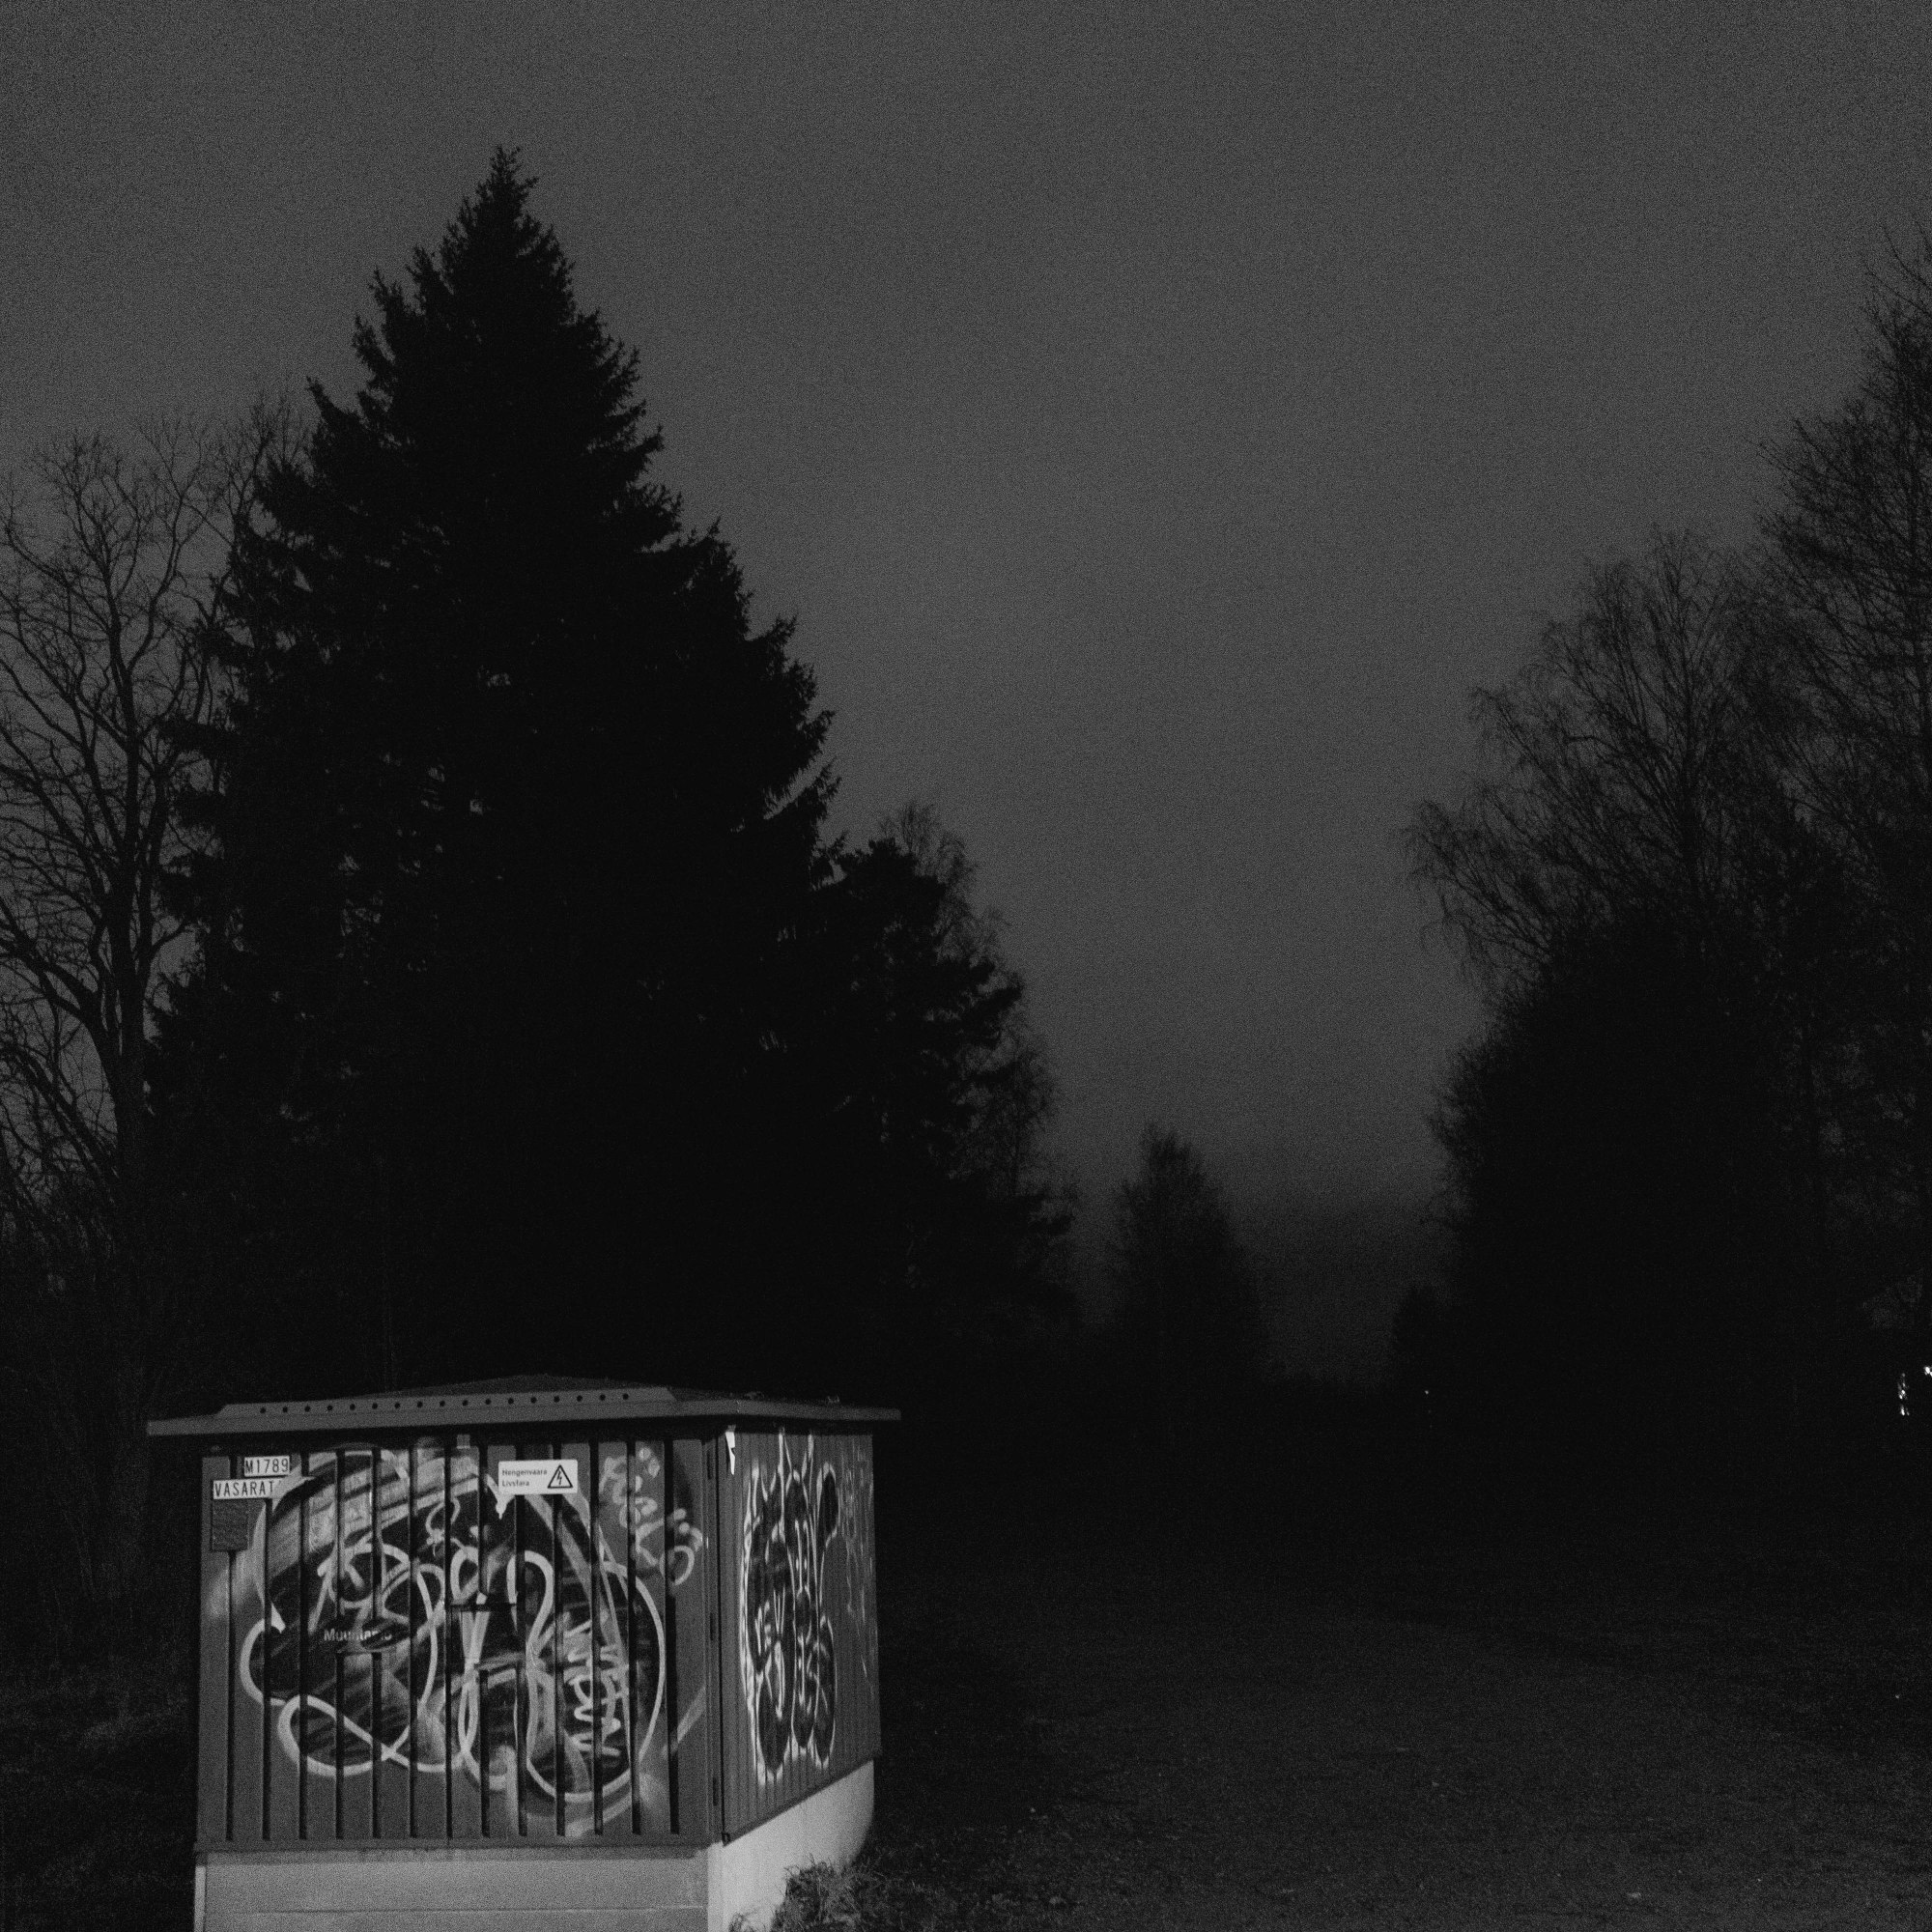
In my style of amateur photography, such factors as ease of use and flexible camera controls mean more than Hi-Fi sensor quality, so for my purposes even my Canon EOS M50 is capable of delivering “good enough” quality in b&w, particularly when shooting RAW. Here, below, are some early hour experiments from today, my Sunday morning walk.
It is obvious that as the proper winter seems to be largely gone, as another sad side effect of global climate change, the outdoor conditions here in wintertime are more like an “eternal November”. The low-light capabilities certainly matter now for a photographer, as do sharp and wide-aperture lenses. But I am personally hunting for certain mood and feeling, and thus I am not so concerned about blur or softness – it can even positively play a part in the artistic style I am looking for.
There are already few hours of (dim) sunlight per day, so it is again time to start thinking about the next chili season. There were some lessons to consider from last year (one of new hydroponics approach – you can read more in my garden thread/category of this blog: https://fransmayra.fi/category/garden/).
One of the lessons was that “slow” chilies and the cold Finnish summer do not go together very well. I am not willing to use electric heaters for extended periods just to keep my plants alive in the greenhouse. Thus, I have decided to remove Rocoto varieties from my selection. They are nice, large chili peppers, but many are also too slow to grow and ripen for my approach.
Another lesson from last year was sort of “positive problem”. The hydroponics is almost “too good” cultivation system for me. The plants really grew large in the new AutoPot 4pot system I got year ago. I had trouble last spring when plants were already so large in April that move from my basement into the outdoor greenhouse would have been necessary, but there was a “takatalvi” (cold spell, with more snow), and I was stuck with them. And when it was warm enough in May, the plants were far too large to be safely carried around, and had suffered from lack of direct sunlight. It was a sort of minor disaster. (See my post at: https://fransmayra.fi/2019/05/30/chilies-in-the-greenhouse/.)
Thus, while I can start thinking about the varieties to grow, I will not germinate them yet.
I need to get my priorities sorted out first. As shown in the above image, I have a lot of chili seeds (these are all ordered from the trusty FataliiSeeds.net store, I think). It makes no sense to try growing too many varieties at the same time, when in reality I have room for maybe 4-6 fully grown plants in the greenhouse.
My initial idea for this year is try to find more compact varieties – so I dropped any chili which says “Mammoth” in its name, for example. After that, there are just two main principles this year:
one or two chilies that are just of right strength and taste for actually eating
one or two chilies that are beatiful and interesting.
My current “shortlist” of chili seeds of different kinds is shown in the image below. In terms of taste, I really like both Lemon Drop (C. baccatum), and then yellow habanero style chilies (e.g. Hainan Yellow Lantern – the Chinese “Emperor Chili”, and Madame Jeanette, which is probably a related, Habanero style yellow chili but which originates from Surinam – these are all C. chinense chilies).
The “visual chili” department is much larger and difficult to sort out at this point. I am considering of trying out some new, multi-coloured varieties. I have experience from Bolivian Rainbow (C. annuum) and Numex Twilight (C. annuum) already. Both are nice, but there are just so many interesting plants out there! If you have any recommendations, please feel free to drop a comment below.
The current, “shortlist” selection of varieties to consider for the Chili Season 2020.
Sports and wildlife photographers in particular are famous (or notorious) for investing in and carrying around lenses that are often just huge: large, long, and heavy. Is it possible to take great photos with small, compact lenses, or is an expensive and large lens the only option for a hobbysist photographer who’d want to reach better results?
Winter details, captured with Canon EOS M50, and the kit lens: EF-M 15-45mm f/3.5-6.3 IS STM.
I am by no means an authority in optics or lens design, but I think certain key principles are important to take into consideration.
Perhaps one of the first ones is the style of photography one is engaged with. Are you shooting portrait photos indoors, or even in a studio? Or, are you tripping outdoors, trying to get closeup photos of elusive birds and animals? Or, are you rather a landscape photographer? Or, a street photographer?
Sometimes the intended use of photos is also a factor to consider. Are these party photos, or something that you’ll aim to share mostly among your friends in social media? Or, is this that important photo art project that you aim output into large-format prints, and hang to your walls – or, in to a gallery even?
These days, digital camera sensors are “sharp” enough for pretty much any purpose – one of my smartphones, Huawei Mate 20 Pro, for example, has a 40 megapixel main photo sensor, with 7296 × 5472 native resolution. That is more than what you need for a large poster print (depending on viewing distances and PPI settings, a 4000 x 6000 pixels, or even 2000 x 3000 pixels might be enough for a poster print). There are many professional photographers who took their commercial photos for years with cameras that had only 6 or 8 megapixel sensors. And many of those photos were reproduced in large posters, or in covers of glossy magazines, and no-one complained.
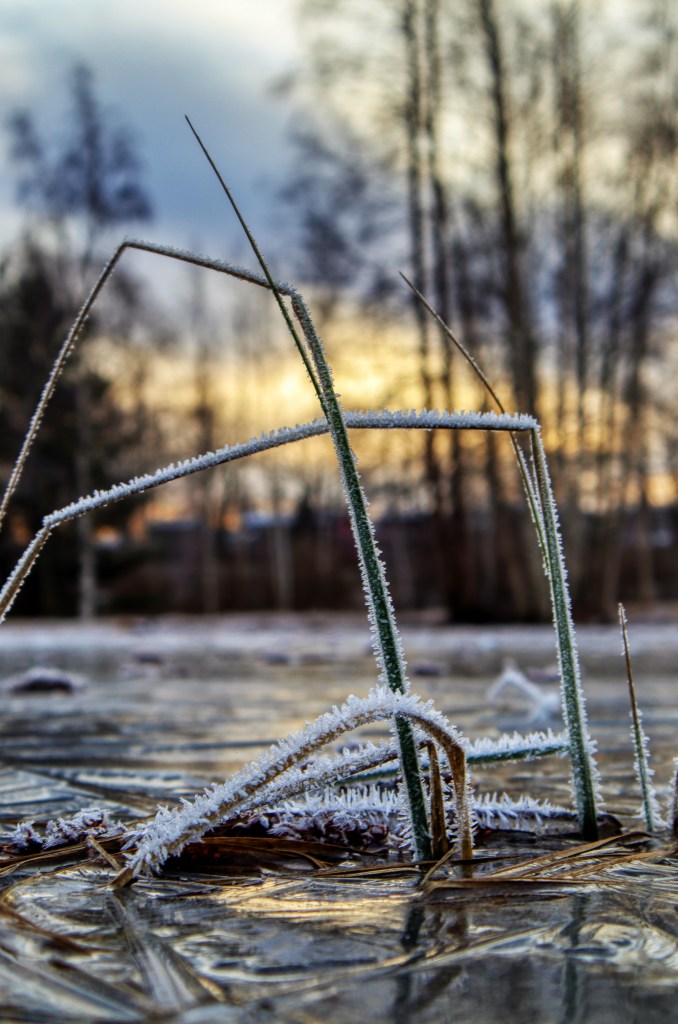
Frozen grass, photographed using Huawei Mate 20 Pro smartphone.
The lens and quality of optics are more of a bottleneck: if the lens is “soft”, meaning that it is not capable of focusing all rays of light in consistent, sharp manner, there is no way of achieving very clear looking images with that. But truth be told, in perhaps 90 % of cases with blurry photos, I blame myself rather than my equipment these days. There are badly focused photos, I had a wrong aperture setting or too long exposure time (and was not using a tripod but shooting handheld) and all that contributes to getting a lot of blurry looking photos.
But it is also true, that if one is trying to achieve very high quality results in terms of optical quality, using a more expensive lens is usually something that many people will do. But actually there are “mainstream” photography situations where a cheap lens will produce results that are just – good enough. It is particularly the more extreme situations, where one is for example trying to get a really lot of light into the lens, to capture really detailed scenes in a very consistent manner, where large, heavy and expensive lenses come to play a role. This is also true of portraiture, where a high-quality lens is also used to deliver good separation of person from the background, and the glass elements, their positioning and the aperture blades are designed to produce particularly nice looking “bokeh” effect (the out-of-focus highlights are blurred in an aesthetically pleasing manner). And of course those bird and wildlife photographers value their well-designed, long telephoto range lenses that also capture a lot of light, thereby enabling the photographer to use short enough exposure times and get sharp images of even moving targets.
A cropped detail, photo taken with SIGMA 150-600 mm f/5-6,3 DG OS HSM Contemporary tele-zoom lens on a dim winter’s day.
In many cases it is actually other characteristics rather than the optical image quality that makes a particular lens expensive. It might be the mechanical build quality, weather-proofing, or the manner the focusing, zooming and aperture mechanisms, and how control rings are implemented that are something a professional photographer might be willing to pay for, in one of their main tools.
In street photography, for example, there are completely different kind of priorities as compared to wildlife photography, or studio portraiture, where using a solid tripod is common. In a street, one is constantly moving, and also trying not to be very conspicuous while taking photos. A compact camera with a compact lens is good for those kinds of reasons. Also, if the targets are people and views on city streets, a “normal range” lens is usually preferable. A long-range telephoto lens, or very wide-angle lens will produce very different kinds of effects as compared to the visual feel and visual experiences that people usually experience as “normal images”. In a 35 mm film camera, or “full-frame” digital camera, a 50 mm lens is usually considered a normal lens, whereas with a camera equipped with a (Canon) “crop” sensor (APS-C, 22.2 x 14.8 mm sensor size) would require c. 30 mm lens to produce similar field of view for the image as a 50 mm in a full-frame camera. Lenses with this kinds of short focal ranges can be designed to be physically smaller, and can deliver very good image quality for their intended purposes, even while being nicely budget-priced. There are these days many such excellent “prime” lenses (as contrasted to more complex “zoom” lenses) available from many manufacturers.
One should note here that in case of smartphone photography, everything is of course even much more compact. A typical modern smartphone camera might have a sensor of only few millimeters in size (e.g. in popular 1/3″ type, the sensor is 4.8 x 3.6 mm), so actual focal length of the (fixed) lens may be perhaps 4.25 mm, but that translates into a 26 mm equivalent lens field-of-view, in a full-frame camera. This is thus effectively a wide-angle lens that is good for many indoor photography situations. Many smartphones feature a “2x” (or even “5x”) sensor-lens combinations, that can deliver a normal range (50 mm equivalent in full-frame) or even telephoto ranges, with their small mechanical and optical constructions. This is an impressive achievement – it is much more comfortable to put a camera capable of high-quality photography into your back pocket, rather than lug it around in a dedicate backbag, for example.
Icy view was taken with Canon EOS M50, and the kit lens: EF-M 15-45mm f/3.5-6.3 IS STM.
Perhaps the main limitation of smartphone cameras for artistic purposes is that they do not have adjustable apertures. There is always the same, rather small hole where rays of light will enter the lens and finally focus on the image sensor. It is difficult to control the “zone of acceptable sharpness” (or, “depth of field”) with a lens where you cannot adjust aperture size. In fact, it is easy to achieve “hyperfocal” images with very small-sensor cameras: everything in image will be sharp, from very close to infinity. But the more recent smartphones have already slighly larger sensors, and there have already even been experiments to implement adjustable aperture system inside these tiny lenses (Nokia N86 and Samsung Galaxy S9 at least have advertised adjustable apertures). Some manufacturers resort to using algorithmic background blurring to create full-frame camera looking, soft background while still using optically small lenses that naturally have much wider depth of field. When you take a look at the results of such “computational photography” in a large and sharp monitor, the results are usually not as good as with a real, optical system. But, if the main use scenario for such photos is to look at them from small-screen, mobile devices, then – again – the lens and augmentation system together may be “good enough”.
All the photos attached into this blog post are taken with either a compact kit lens, or with a smartphone camera (apart from that single bird photo above). Looking at them from a very high resolution computer monitor, I can find blurriness and all kinds of other optical issues. But personally, I can live with those. My use case in this case did not involve printing these out in poster sizes, and I just enjoyed having a winter-day walk, and taking photos while not carrying too heavy setup. I will also be posting the photos online, so the typical viewing size and situation for them pretty much obfuscates maybe 80 % of the optical issues. So: compact cameras, compact lenses – great photos? I am not sure. But: good enough.
More frozen grass, Canon EOS M50, and the kit lens: EF-M 15-45mm f/3.5-6.3 IS STM.
Ten years ago, 2010, I blogged about the new kiuas (stove) for our sauna, Harvia Figaro. Just before Christmas this year, this kiuas broke down. There was an electric failure (the junction box of kiuas basically exploded, there was an electric short circuit), and I am not an engineer enough to say whether some underlying failure in stove itself was the reason, or just the weakly designed connections in the junction box failing over time. Luckily our circuit breakers worked just fine – we just missed one fundamental Finnish tradition: joulusauna.
Looking inside the Harvia after 10 years of use was eye-opening. The heater elements (lämpövastukset) of kiuas were pretty much gone. Also, we could not really completely trust the controller, timer and other electronics inside Harvia after the dramatic short circuit. So I decided to get a new kiuas.
After some careful examination and discussion about the needs and priorities of our family, the choice was Tulikivi Sumu ST 9 kW model. This is specced for a 8-13 m³ sauna room, so hopefully it would be suitable for our case. (More, see: https://www.tulikivi.fi/tuotteet/Sumu_ST .)
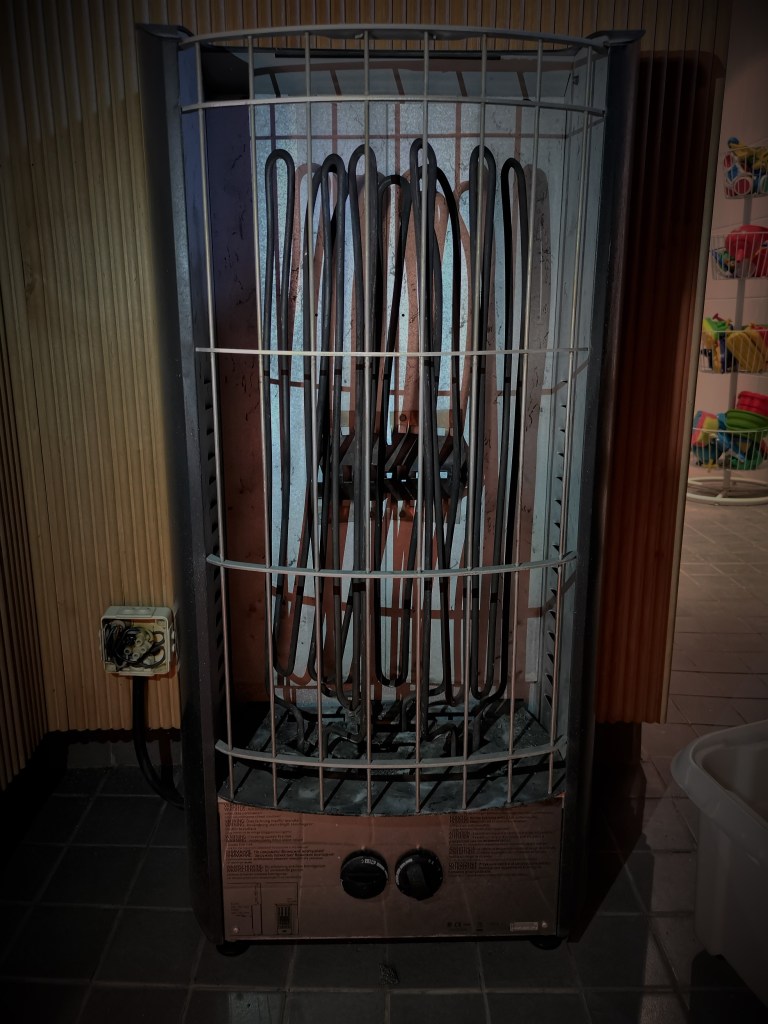
The working class hero. – The sad final state of our Harvia Figaro, FG90.
One of the lessons from Harvia was that a long construction with an open side that exposes the stones is challenging: the small stones can easily even squeeze out through the steel bars, and the tall heater elements become strained among the moving stones. I blame myself for not being diligent enough to take the stones out at least a few times per year, washing them, and then putting them back – the heater elements would no doubt stayed in better shape and the entire kiuas maybe even lived longer that way. At the same time, it must be said that positioning stones among the heater elements inside a kiuas that is 94 cm deep, is hard. The inside edges or rim of the steel box were so sharp in Harvia Figaro, that it was bit painful to squeeze your hand (and stones) deep inside kiuas. And this kiuas took maximum amount of 90 kg of stones. This sounded great when we got it (in theory at least, a massive kiuas gives more balanced “löyly” – the experience derived from such elements as right temperature, the release of steam and the atmosphere), but in the end this design was one of the reasons we did not maintain the kiuas in the manner it should have been done (we did of course change the stones, but probably not as often as it should have been done).
The new kiuas, Tulikivi Sumu, is also rather tall, but the external dimensions hide the fact that Tulikivi relies on dual-casing construction: there are isolating cavities inside kiuas, and this model only takes 60 kg of stones (rather than 90 kg of Harvia Figaro). Together with the smaller internal dimensions, this is clearly easier kiuas to handle and maintain.
We also (of course) always use a professional electrician to install a kiuas. This time, the installed, new junction box was also a more sturdy and hopefully electrically safer and more durable model.
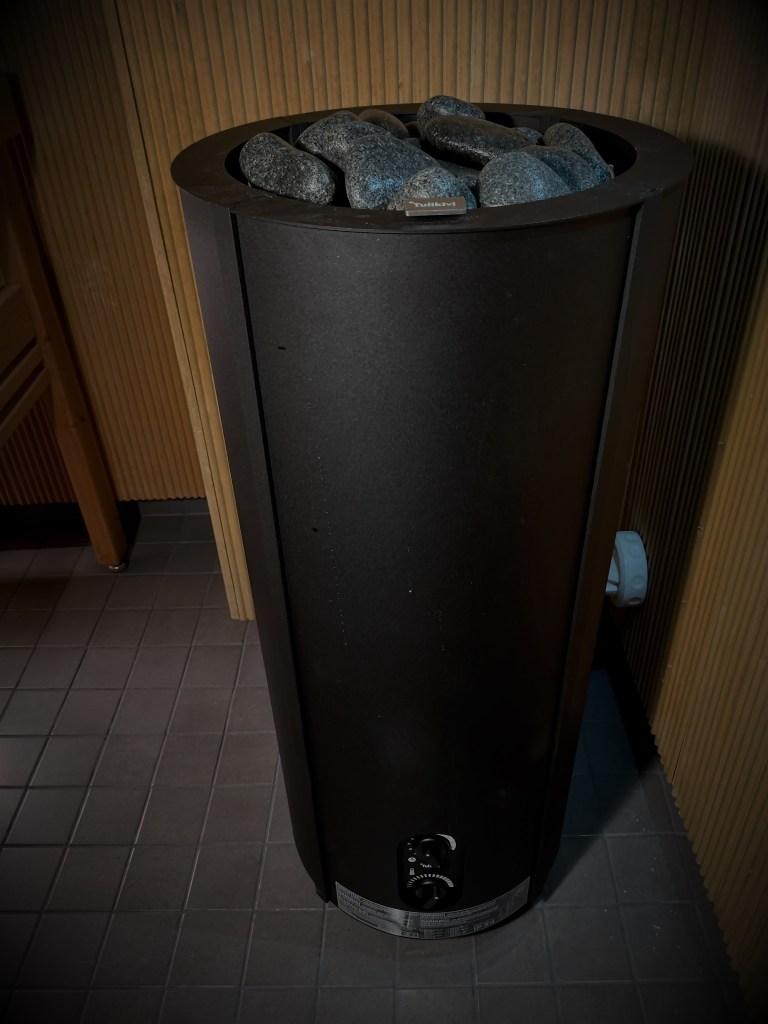
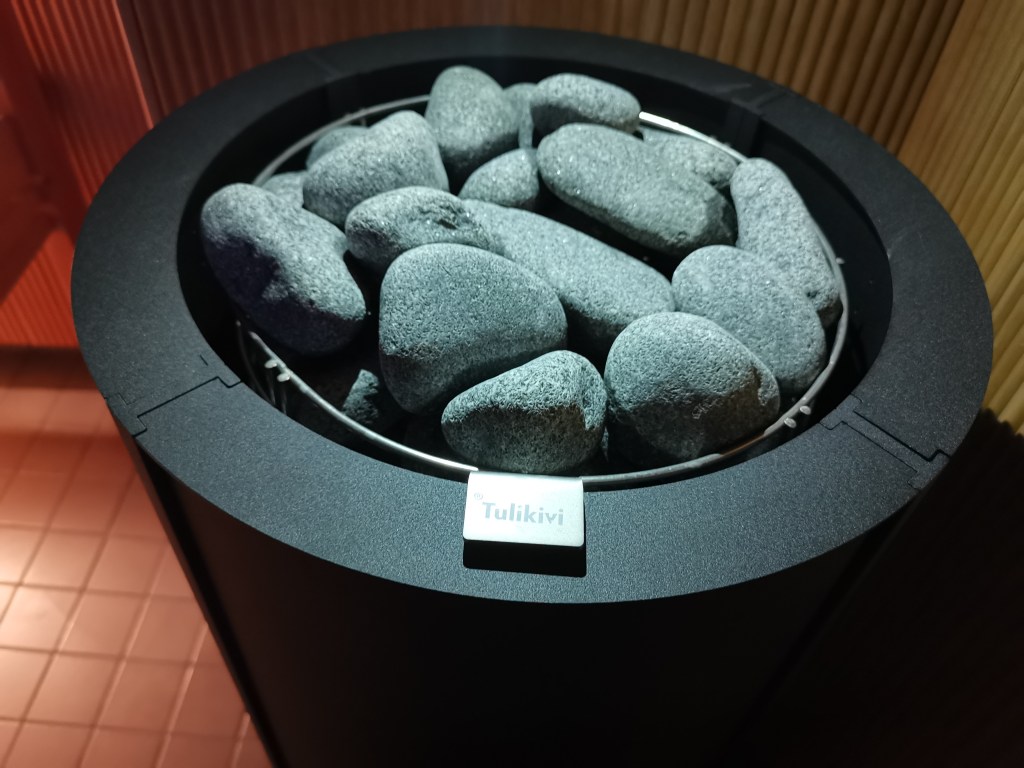
Our new Tulikivi Sumu ST, black 9 kW model.
The dual shell casing of Tulikivi means that it is also safer – this is something that the company also advertises, alonside with their expertise in traditional soapstone stoves (vuolukivi – they are based in Nunnalahti, Juuka, North Karelia). The outer surfaces of this stove get warm, but they do not get so hot that you would get burns, if you touch it while it is heating. Btw, this also means that the safe distances to wooden seats (lauteet) or walls can be very small. One could even integrate this kiuas inside lauteet, having the top of kiuas with its hot stones sticking out among the people sitting in lauteet. We are not going for that option, though.
One thing that I really tried to do carefully this time was positioning of the kiuaskivet – stones of the stove. I have become increasingly aware that you should not just randomly throw stones into the electric stove, and hope that kiuas would give good löyly – or that it would even be safe.
The instruction manual of Tulikivi even explitly says that their warrantly will be void, if the stones are positioned wrongly, and that if stones are too tightly or too loosely positioned, it can even cause fire.
The basic idea is that there should always be enough air cavities inside a kiuas, but also that the electric heater elements are not bare at any point. There should be a sort of internal architecture to the kiuaskivet: one needs to find large stones that fit in and work as supports in larger spaces, flat stones that are like internal “support beams”, taking the weight and supporting those stones that will come on the next layer. The weight of stones should not be focused on the heater elements, as otherwise they will become twisted and deformed under pressure. There should also be air channels like internal chimneys that allow hot air to move upwards, and transfer the heat from the heater elements into the kiuaskivet (stones) and also into the air of sauna room.
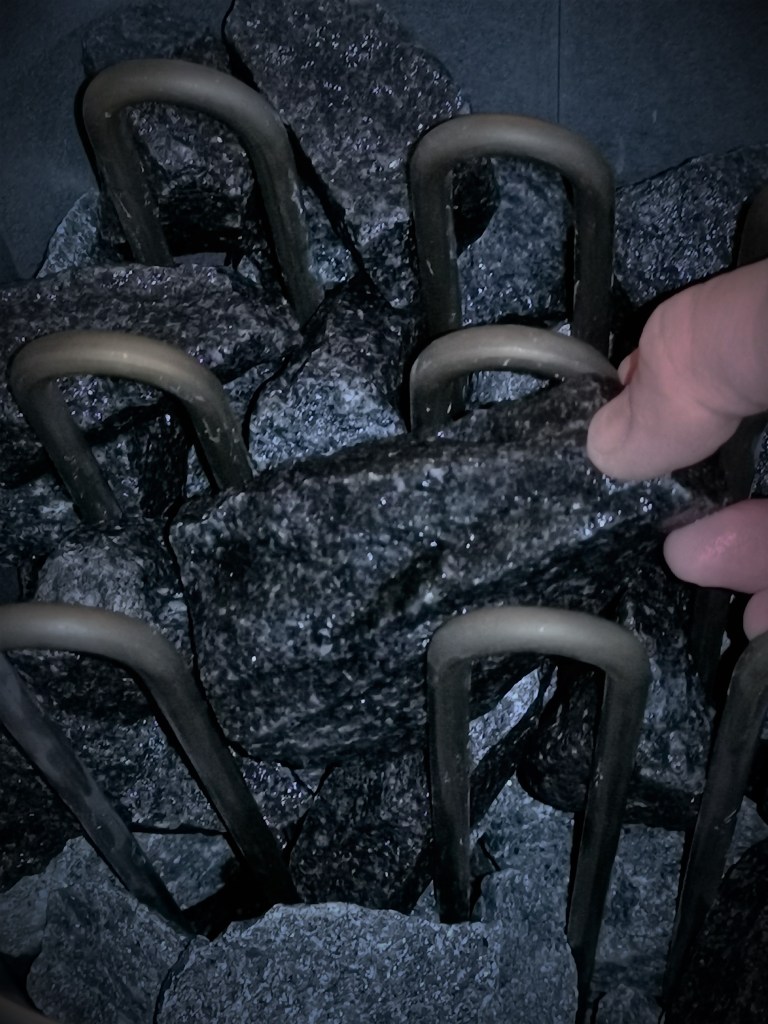
Positioning the rough-cut olivine diabase rocks on top of each other, trying to create a suitable labyrinthine, yet also solid internal structure inside the kiuas.
We use olivine diabase as the sauna stones – this is what Tulikivi also recommends. This is a rather durable and heavy rock material, meaning that it will not break under temperature change strains quickly, and since it is a heavy stone, it will also store and release heat. We use also small number of rounded olivine diabase stones at the top of kiuas. This is mostly for decorative purposes, even if some experts claim that rounded stones will also spread löylyvesi (water you throw into kiuas in Finnish sauna to get löyly), as water flows smoothly from rounded stones, end up deeper inside kiuas, and thereby produce more smooth löyly.
It should be said that selection of löylykivet, their positioning, and all such details of “sauna-knowhow” are subjects of endless passionate debates among the Finns. You can go e.g. into this good site (use the Google Translator, if needed) and read more: https://saunologia.fi/kiuaskivet/ .
Now, we’ll just need to take care of those lauteet, too. – Meanwhile: Hyviä löylyjä!


You must be logged in to post a comment.