Thunderbolt 3, eGPUs

(This is the first post in a planned series, focusing on various aspects of contemporary information and communication technologies.)

The contemporary computing is all about flow of information: be it a personal computer, a mainframe server, a mobile device or even an embedded system in a vehicle, for example, the computers of today are not isolated. Be it for better or worse, increasingly all things are integrated into world-wide networks of information and computation. This also means that the ports and interfaces for all that data transfer take even higher prominence and priority, than in the old days of more locally situated processing.

Thinking about transfer of data, some older generation computer users still might remember things like floppy disks or other magnetic media, that were used both for saving the work files, and often distributing and sharing that work with others. Later, optical disks, external hard drives, and USB flash drives superseded floppies, but a more fundamental shift was brought along by Internet, and “cloud-based” storage options. In some sense the development has meant that personal computing has returned to the historical roots of distributed computing in ARPANET and its motivation in sharing of computing resources. But regardless what kind of larger network infrastructure mediates the operations of user and the service provider, all that data still needs to flow around, somehow.

The key technologies for information and communication flows today appear to be largely wireless. The mobile phone and tablet communicate to the networks with wireless technologies, either WiFi (wireless local area networking) or cellular networks (GSM, 3G and their successors). However, all those wireless connections end up linking into wired backbone networks, that operate at much higher speeds and reliability standards, than the often flaky, local wireless connections. As data algorithms for coding, decoding and compression of data have evolved, it is possible to use wireless connections today to stream 4K Ultra HD video, or to play high speed multiplayer games online. However, in most cases, wired connections will provide lower latency (meaning more immediate response), better reliability from errors and higher speeds. And while there are efforts to bring wireless charging to mobile phones, for example, most of the information technology we use today still needs to be plugged into some kind of wire for charging its batteries, at least.

Thunderbolt 3 infographic, (c) Intel

This is where new standards like USB-C and Thunderbolt come to the picture. Thunderbolt (currently Thunderbolt 3 is the most recent version) is a “hardware interface”, meaning it is a physical, electronics based system that allows two computing systems to exchange information. This is a different thing, though, from the actual physical connector: “USB Type C” is the full name of the most recent reincarnation of “Universal Serial Bus”, an industry standard of protocols, cables, and connectors that were originally released already in 1996. The introduction of original USB was a major step into the interoperability of electronics, as the earlier situation had been developing into a jungle of propriety, non-compatible connectors – and USB is a major success story, with several billion connectors (and cables) shipped every year. Somewhat confusingly, the physical, bi-directional connectors of USB-C can hide behind them many different kinds of electronics, so that some USB-C connectors comply with USB 3.1 mode (with data transfer speeds up to 10 Gbit/s in “USB 3.1 Gen 2” version) and some are implemented with Thunderbolt – and some support both.

USB-C and Thunderbolt have in certain sense achieved a considerable engineering marvel: with backward compatibility to older USB 2.0 mode devices, this one port and cable should be able to connect to multiple displays with 4K resolutions, external data storage devices (with up to 40 Gbit/s speeds), while also working as a power cable: with Thunderbolt support, a single USB-C type port can serve, or drain, up to 100 watts electric power – making it possible to remove separate power connectors, and share power bricks between phones, tablets, laptop computers and other devices. The small form factor Apple MacBook (“Retina”, 2015) is an example of this line of thinking. One downside for the user of this beautiful simplicity of a single port in the laptop is need for carrying various adapters to connect with anything outside of the brave new USB-C world. In an ideal situation, however, it would be a much simpler life if there would only be this one connector type to worry about, and it would be possible to use a single cable to dock any device to the network, gain access to large displays, storage drives, high speed networks, and even external graphics solutions.

The heterogeneity and historical layering of everyday technologies are complicating the landscape that electronics manufacturers would like to paint for us. As any student of history of science and technology can tell, even the most successful technologies did not replace the earlier ones immediately, and there has always been reasons why people have been opposing the adoption of new technologies. For USB-C and Thunderbolt, the process of wider adoption is clearly currently well underway, but there are also multiple factors that slow it down. The most typical peripheral does not yet come with USB-C, but rather with the older versions. Even in expensive, high end mobile phones, there are still multiple models that manufacturers ship with older USB connectors, rather than with the new USB-C ones.

A potentially more crucial issue for most regular users is that Thunderbolt 3 & USB-C is still relatively new and immature technology. The setup is also rather complex, and with its integration of DisplayPort (video), PCI Express (PCIe, data) and DC power into a single hardware interface it typically requires multiple manufacturers’ firmware and driver updates to work seamlessly together, for TB3 magic to start happening. An integrated systems provider such as Apple has best possibilities to make this work, as they control both hardware as well as software of their macOS computers. Apple is also, together with Intel, the developer of the original Thunderbolt, and the interface was first commercially made available in the 2011 version of MacBook Pro. However, today there is an explosion of various USB-C and Thunderbolt compatible devices coming to the market from multiple manufacturers, and the users are eager to explore the full potential of this new, high speed, interoperable wired ecosystem.

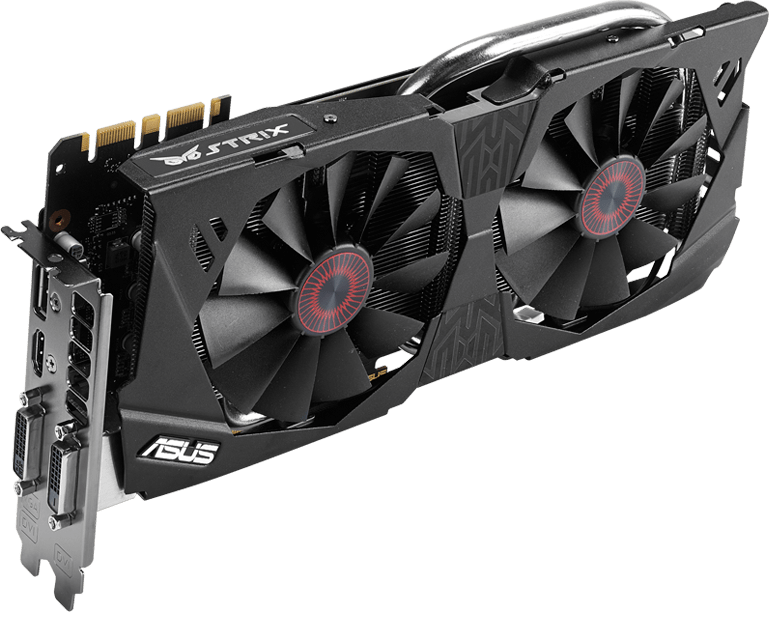
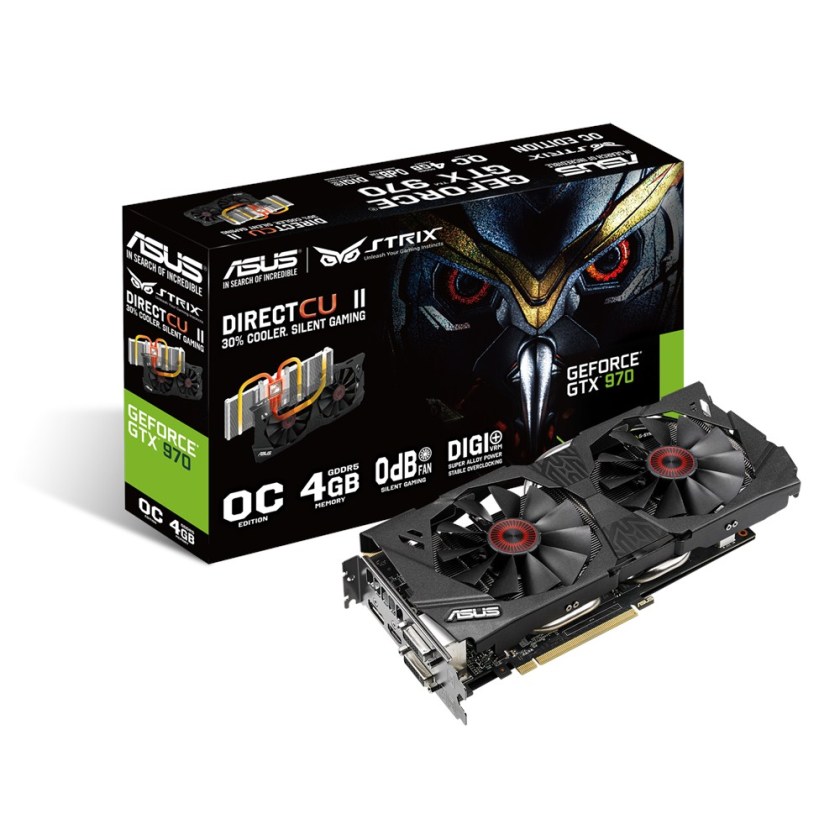
eGPU, or External Graphics Processing Unit, is a good example of this. There are entire hobbyist forums like eGPU.io website dedicated to the fine art of connecting a full powered, desktop graphics card to a laptop computer via fast lane connections – either Expresscard or Thunderbolt 3. The rationale for this is (apart from the sheer joy of tweaking) that in this manner, one can both have a slim ultrabook computer for daily use, with a long battery life, that is then capable of transforming into an impressive workstation or gaming machine, when plugged into an external enclosure that houses the power hungry graphics card (these TB3 boxes typically have full length PCIe slots for installing GPUs, different sets of connection ports, and a separate desktop PC style power supply).  VR (virtual reality) applications are one example of an area where current generation of laptops have problems: while there are e.g. Nvidia GeForce GTX 10 series (1060 etc.) equipped laptops available today, most of them are not thin and light for everyday mobile use, or, if they are, their battery life and/or fan noise present issues.

Razer, a American-Chinese computing hardware manufacturer is known as a pioneer in popularizing the field of eGPUs, with their introduction of Razer Blade Stealth ultrabook, which can be plugged with a TB3 cable into the Razer Core enclosure (sold separately), for utilizing powerful GPU cards that can be installed inside the Core unit. A popular use case for TB3/eGPU connections is for plugging a powerful external graphics card into a MacBook Pro, in order to make it into a more capable gaming machine. In practice, the early adopters have faced struggles with firmwares and drivers that do not provide direct support from either the macOS side, or from the eGPU unit for the Thunderbolt 3 implementation to actually work. (See e.g. https://egpu.io/akitio-node-review-the-state-of-thunderbolt-3-egpu/ .) However, more and more manufacturers have added support and modified their firmware updates, so the situation is already much better than a few months ago (see instructions at: https://egpu.io/setup-guide-external-graphics-card-mac/ .) In the area of PC laptops running Windows 10, the situation is comparable: a work in progress, with more software support slowly emerging. Still, it is easy to get lost in this, still evolving field. For example, Dell revealed in January that they had restricted the Thunderbolt 3 PCIe data lanes in their implementation of the premium XPS 15 notebook computer: rather than using full 4 lanes, XPS 15 had only 2 PCIe lanes connected in the TB3. There is e.g. this discussion in Reddit comparing the effects this has, in the typical case that eGPU is feeding image into an external display, rather than back to the internal display of the laptop computer (see: https://www.reddit.com/r/Dell/comments/5otmir/an_approximation_of_the_difference_between_x2_x4/). The effects are not that radical, but it is one of the technical details that the early users of eGPU setups have struggled with.

While fascinating from an engineering or hobbyist perspective, the situation of contemporary technologies for connecting the everyday devices is still far from perfect. In thousands of meeting rooms and presentation auditoriums every day, people fail to connect their computers, get anything into the screen, or get access to their presentation due to the failures of online connectivity. A universal, high speed wireless standard for sharing data and displaying video would no doubt be the best solution for all. Meanwhile, a reliable and flexible, high speed standard in wired connectivity would go a long way already. The future will show whether Thunderbolt 3 can reach that kind of ubiquitous support. The present situation is pretty mixed and messy at best.

Hydroponic chilies, pt. 2

My experiment with the Ikea hydroponics system has now produced a nice selection of small chili seedlings. The next step is moving them from the nursery box into the cultivation kit. Below are some photos: the idea is to completely bury the stone wool “starter plug” (now penetrated by chili roots) into coarse pumice stone pieces, within perforated cultivation pots. After those are placed into the cultivation kit, one just needs to fix the kit with a mix of fertilizer and water in suitable ratio (half capful into 4 liters of water is Ikea’s own Växer recommendated ratio, I did put in a bit more).  Those pots which are not in use should be covered with provided lids, as this prevents algae growth in the kit. The pumice stone gravel absorbs the liquid, providing chili seedlings with both water, nutritients, and access to air. Let’s see how this goes on from this…

New chili season, 2017

In January, it is again time to sow the seeds for 2017 chili crops. This time, I have a theme: colour ‘yellow’. Well, almost all my chilies this season are yellow, but not quite, as you can notice from below.

Another new concept this year for me is hydroponics. The idea of hydroponic gardening is to use no soil, but rather just expose plants to water, nutrients and sunlight. The plants’ roots will be circulated by a mineral solution, and there is some supportive, non-organic material used to keep the plants growing up in firm position.

I will most likely not develop a full hydroponic system when these chilies move to our greenhouse, but I will try it out in the germinating and seedling growing phases. To make things as easy (and as cost-effective) as possible, I got the entire system from IKEA. They have also some videos about the hydroponic indoor gardening and the techniques and materials they had chosen in their website at: http://www.ikea.com/gb/en/products/indoor-gardening/.

IKEA shopping
IKEA shopping…

The germination process is handled with a simple tray with holes, some plugs made of stone wool (a fibrous mineral material), a water box below, and protective plastic cover with some air ventilation holes.

IKEA nursery box
IKEA nursery box.

As not all seeds germinate, it is a good idea to put 2-3 seeds per plug.

Chili seeds on stone wool plugs
Chili seeds on stone wool plugs.

The optimal temperature for most chili varieties’ germination is around 27-29 Celsius degrees, so I use an electric warming mat below the nursery to keep the temperature even. There is also a LED light with plants’ wavelengths in the IKEA system, the cultivation insert set for seedling phase is intended to be combined with the pumice stone (volcanic rock from Iceland), which allows roots support and access to hydroponic growing solution, while also allowing airflow to the plant roots.

IKEA cultivation insert set for hydroponics
IKEA cultivation insert set for hydroponics.

This time, the chili varieties I chose for growing are: Pequin Firecracker (c. annuum), a hybrid Tepin x Lemon Drop (c. annuum x baccatum), 7 Pot Brain Strain Yellow (c. chinense), Lemon Drop (c. baccatum), Goat’s Weed (c. annuum), Peito de Moca (c. chinense), Bhut Jolokia (which is now classified as a c. chinense x frutescens hybrid from India?), Aji Cristal (c. baccatum), Aji Fantasy (a commercial Finnish c. baccatum hybrid of Lemon Drop x PI 441551), a non-specified ‘Thai’ chili variety (c. annuum), Habanero Hot Lemon (c. chinense), Fatalii (c. chinense), and my old favourite, yellow Madame Jeanette (c. chinense, a habanero chili from Suriname). Old familiar ones, and new acquaintances. Happy new chili season, all fellow chili-heads!

Chili growing is a multi-form hobby
Chili growing is a multi-form hobby.

PS. Here is also a cheerful video by IKEA about the joys of hydroponics:

Chili harvesting, greenhouse project 

It is late August and the first batch of chillies is getting ready for harvesting. The first ones to produce good yield were Fire Flame and Thai Rawit. Others that also had produced some ripe chillies at this point were: Habanero Hot Lemon, Madame Jeannette, Lemon Drop, Fatalii, Trepadeira da Werner and Moruga Scorpion. There are also Aji Cristal and Aji Fantasy crops coming along, bit later. The giant of them all was Moruga Scorpion, which really flourished in the heat of this summer. Most habaneros and thai chillies remained small in contrast, but still producing nice pods. The only real failure this summer was my excess watering almost killing the sole Trepadeira da Werner. Next summer, the automatic irrigation with the Blumat system is probably in order. This summer it was all manual, since we were close at home  whole summer. 

Greenhouse: Waiting for the harvest

This is the first summer when our greenhouse is in use. So far everything seems to have gone just fine, even while we have been so busy in other areas that we have not really got so much time for the garden or the greenhouse. Even with just minimal care, most greenhouse plants seem to do well – Laura’s tomatoes exceedingly so, they have grown into real giants. My chillies would had profited from earlier change to the greenhouse and to larger pots, but I did not have the electric heater at that time. So my plants are mostly small to medium in size, but on the other hand the idea of this first summer was not so much to maximise the crop, but to test a wide variety of plants, and then see where to specialize in the future. For that purspose, my small but fruit-filled plants suit very well. Here are some photos taken from the greenhouse today.

Garden photos, 11.7.2016Garden photos, 11.7.2016Garden photos, 11.7.2016Garden photos, 11.7.2016Garden photos, 11.7.2016Garden photos, 11.7.2016Garden photos, 11.7.2016Garden photos, 11.7.2016Garden photos, 11.7.2016

Greenhouse: container for growing bags

Today another key element for our greenhouse was completed. Tomatoes will be cultivated in Biolan brand growing bags (“kasvusäkki”), and our DIY version involves preparing containers that include water tanks and soil-filled pipes that connect the growing bags with the water reservoir. The setup is completed with spiral-shaped, aluminium supports of Juliana that help tomatoes to grow upwards.
image

image

image

image

image

image

image

image

image

image

Greenhouse: the heater

Yesterday, the heater for our greenhouse finally arrived and we can now actually keep the plants in the greenhouse, around the clock. As you can see from the Netatmo screenshots from below, the morning temperature outside was 1,7°C, but with the help of our heater (BioGreen Palma Digit, including Thermo 1 digital thermostat), the temperature inside greenhouse remained comfortable 12-13 degrees. The safety instructions for the heater say that there should be 40-50 cm empty space between the heater and our wooden plant crates, plus c. 1,5 meters empty space ahead, where the heater directs the hot air flow – this proved to be bit of a challenge in our small Juliana, but putting the heater on top of a metal chair for the night also the safety considerations have now worked out fine, I think. And chillies seem to like the move to outdoors, they get more light and the moist air of greenhouse is good for them, too. (Got an extra sapling from our kid’s school rummage sale – a Trinidad Scorpion Moruga Red; let’s see how that one turns out…)

image

image

image

image

image

image

Greenhouse: the water pipes

Today  the watering system of our greenhouse took some nice steps towards completion – the photos below pretty much tell the story, but: we installed a (Bauhaus) black plastic water barrel for temperature control purposes as well, a (Gardena) water tube system to deliver the water below greenhouse structures, and drilled couple of holes for the automatic Blumat watering system – This is still in “closed loop” mode, until the temperature is high enough for leaving plants permanently into the greenhouse. We tried to find a suitable electric heater from Tampere  but it seems no-one has such available.

image

image

image

image

image

image

image

Greenhouse project, continued.

New summer is approaching, and the greenhouse project of course continues (see the previous parts of the story, starting from Part 1 onwards). The greenhouse itself, and its foundation with its freezing protection structures appear to have survived the first winter just fine, which is a good starting point. The next challenges are related to temperature and water. The dual challenges of temperature control in a small greenhouse connect to it’s small air-mass getting excessively hot in daytime, and the near-freezing temperatures affecting it to the other extreme in the night time, particularly early in the spring (or late in the autumn). The automatic ventilation of our Juliana greenhouse is based on the single roof window being opened by the gas spring when the air at the top part of the greenhouse gets hot enough. In sunny days though one ventilation window is not necessarily enough, so opening the greenhouse door as well might be necessary. Also, the sensitive young plants need to be protected from direct sunlight somehow; our solution now is based on reflective, aluminium shade fabric that mirrors enough radiation from the sun so that the temperature and light conditions are now closer to optimum.

The plans for the watering system involve the use of Blumat automated watering system and a dark plastic water tank – this will both help to keep the moisture levels good, and dark water tank will also store warmth during daytime, and release it at night, helping to balance cold nights. While our chilies will be fed by Blumat system the tomatoes will get their own, handmade plant pot/water tank system. (This is still under construction.) Temperature and hydrometer functions are provided by the outdoor Netatmo unit, which has a nice smartphone app.

Today, there were many spring tasks in the garden, and one involved moving the chilli saplings (which had overgrown their small pots) into larger pots, with some fresh soil. It would be so nice to be able to just leave the chillies into the greenhouse already, but nights in Finland in early May are just too cold – so, since we do not have a petrol or electric heater for nights, the chilli plants need to be carried indoors every night, and back in the morning, as long as the cold nights go on. Let’s see how long it takes for me to go out and get that heater…

Gaming station, next generation

As I wrote around Christmas 2011, I made my latest big PC upgrade then, going for Asus P8Z68-V, GEN3 motherboard and ASUS GTX 560 Ti DirectCU II TOP based system. This served me four, rather than planned five years though. Apparently the motherboard peripherals failed, and then BIOS upgrade went astray, plus botched CMOS reset attempt finally killed the motherboard completely – some nice components were left to my hands, but this system lives no more: https://fransmayra.fi/2011/12/28/the-five-year-upgrade-plan/.

I must say that while setting up your own PC is interesting in itself, the compatibility and driver issues are also bit stressful and tiresome (particularly now, having spent most of last night fighting to revive the old PC system). Thus, this time I decided to submit an order to a store that sells pre-configured, pre-installed and tested PCs that also have the operating system set up. After comparing prices and configurations a bit, I ended up with SystemaStore shop from Oulu. These are some of the highlights of this new gaming station:

Processor: INTEL Core i5-6500 3.2GHz LGA1151 6MB BOXED
Cooler Master HYPER 212 EVO
Motherboad: ASUS Z170-P LGA1151 ATX DDR4 (max. 64GB ram)
Memory: Kingston HyperX Fury 8GB(2x4GB) DDR4 2133Mhz
SSD: Samsung 850 EVO 250GB SSD SATA3
HDD: 1TB 7200RPM SATA3 (Seagate barracuda st1000dm003)
Graphics card: ASUS Strix GeForce GTX 970 OC 4GB (0dB IDLE)
DVD drive: 24X DVD+-RW SATA
Case: Corsair Carbide 200R USB3.0 ATX kotelo
Power source: Corsair 650W 80Plus® Certified ATX (VS650)
Connections: USB2.0/USB3.0/USB type C
OS: Windows 10 64-bit home FI

Let’s see how long it takes before this arrives and I will be able to do the tests (and start working and playing with it – hopefully before my Christmas vacation is over!)

Some product photos:

ASUS-P170-sideways
ASUS Z170-P LGA1151 ATX DDR4

Asus-STRIX-970
ASUS Strix GeForce GTX 970 OC 4GB

Asus-STRIX-970-box
ASUS Strix GeForce GTX 970, box

Cooler-Master-EVO
Cooler Master Hyper 212 EVO

Corsair-200r
Corsair Carbide 200R case

intel_core_i5-6500_32ghz_lga1151_6mb_cache_up_to_360ghz_fc-lga14c_skylake_box-34173680-2
Intel Core i5 processor box

Kingston-Fury
Kingston HyperX Fury DDR memory

Samsung-EVO-SSD
Samsung EVO 250 GB SSD


Corsair VS650 power source
 
More about the motherboard here: https://www.asus.com/fi/Motherboards/Z170-P/

More about the graphics card here: https://www.asus.com/fi/Graphics-Cards/STRIXGTX970DC2OC4GD5/